

Disclaimer: As with any Do It Yourself guide, proceed at your own risk. I am not responsible for any damage you may do to your car attempting this install.
Things you’ll need are:
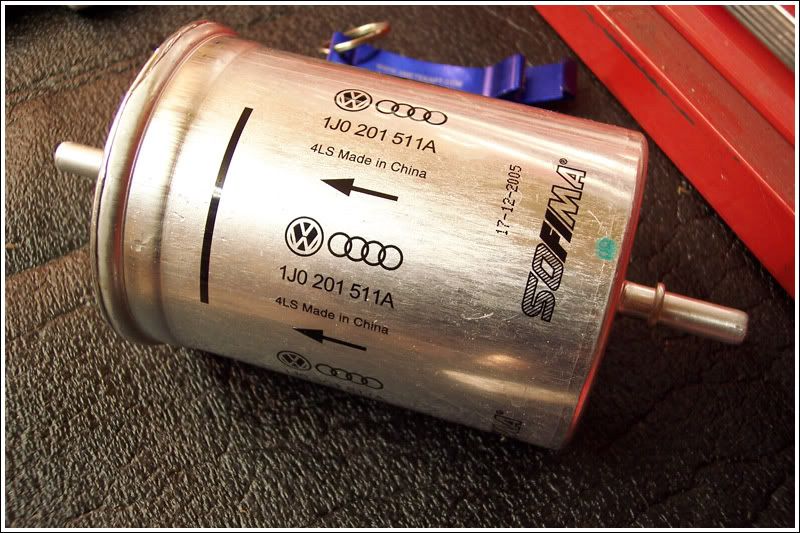
- New Fuel Filter (Volkswagen P/N: 1J0-201-511-A)
- Floor Jack
- Jack Stand
- Flathead screwdriver
- Pick tool of some sort
- Gas catch can
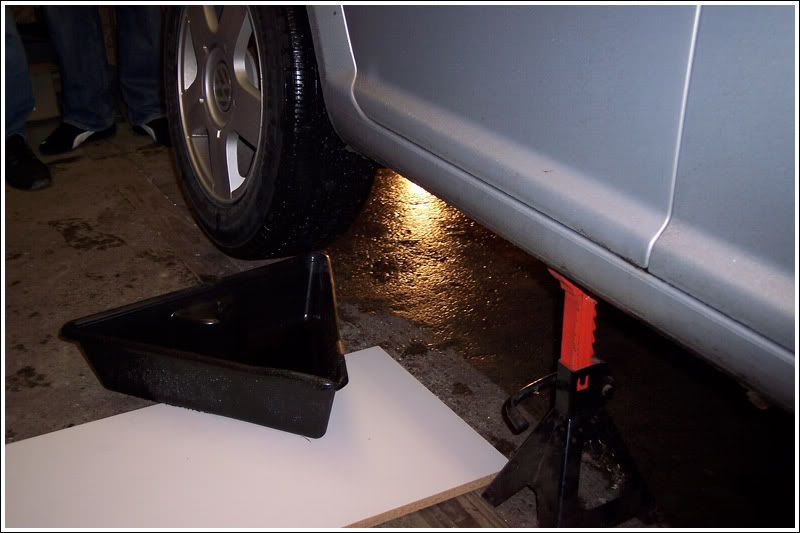
1. Start by jacking up the car at the passenger-side rear wheel. Place a jack-stand under the car and remove the floor jack. You will need to work under the area where you just jacked the car from.
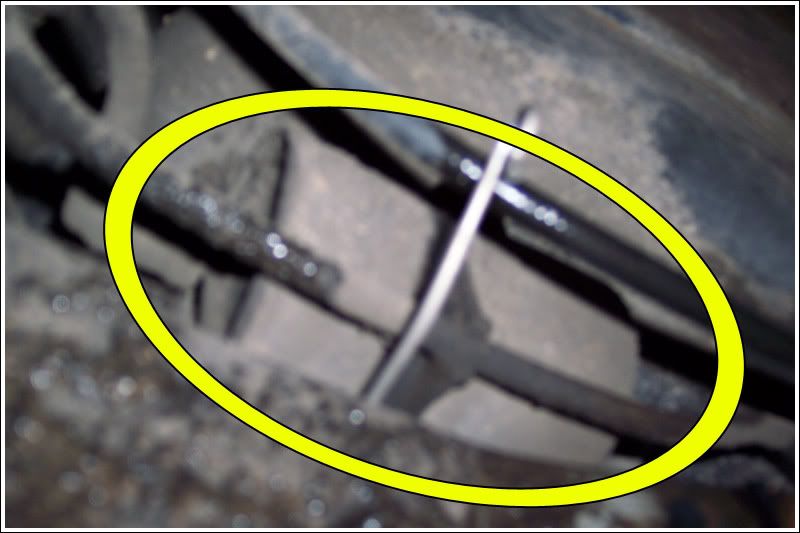
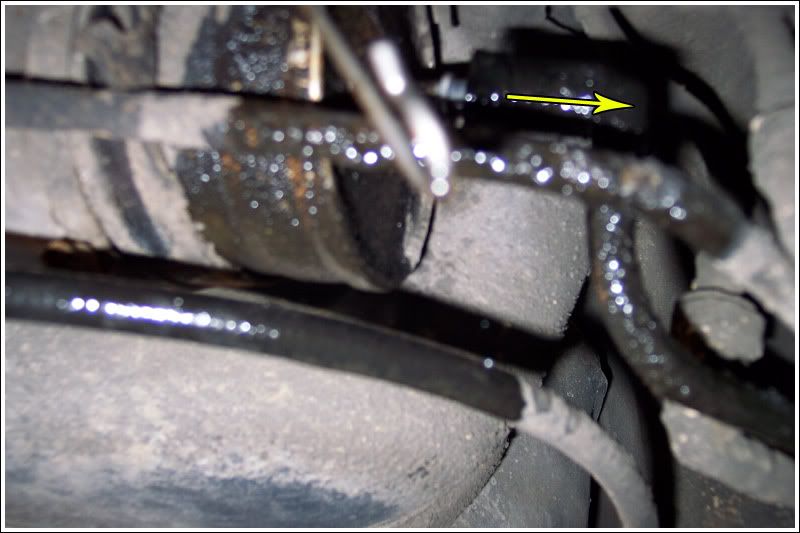
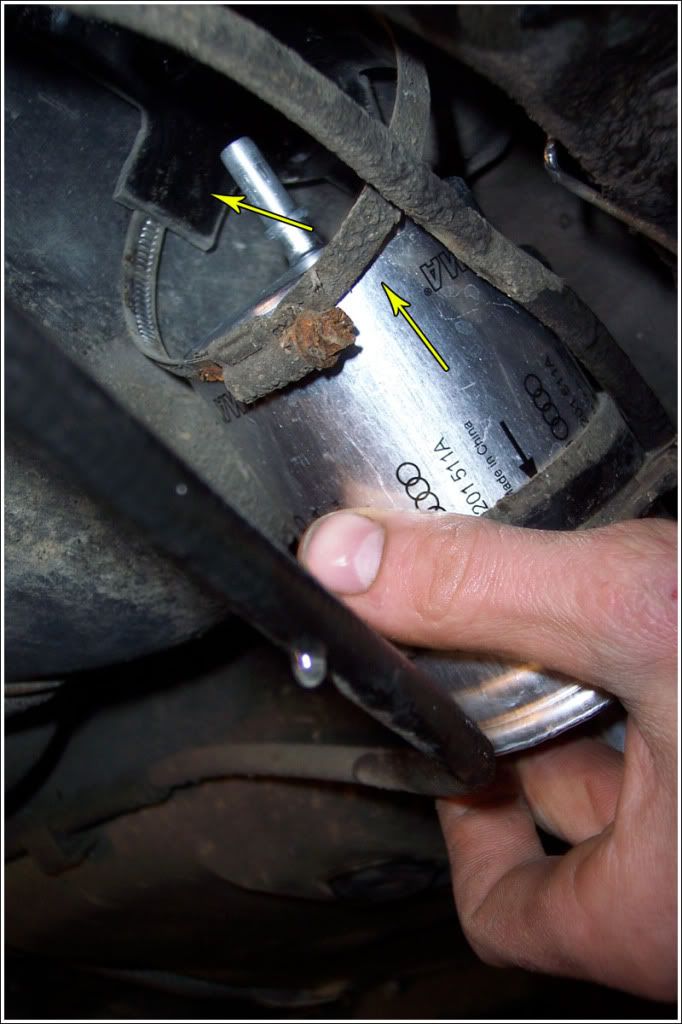
2. Look under the car to locate the fuel filter. It’s located under the passenger-side rear door and is probably covered in dirt.
Note – The picture is out of focus, but it gives you an idea of what to look for. Find the cylindrical “can” behind some lines.
3. Use your flathead screwdriver to loosen the band clamp around the filter.
Note – If it is too rusty to remove, use an 8mm socket to loosen the entire thing (see Note 2)
Note 2 – If you have to loosen the entire thing, spray with penetrating oil first to loosen the rust. Not doing so increases the chance of stripping the threads. Let soak if necessary.
4. Place your gas catch can under the fuel filter.
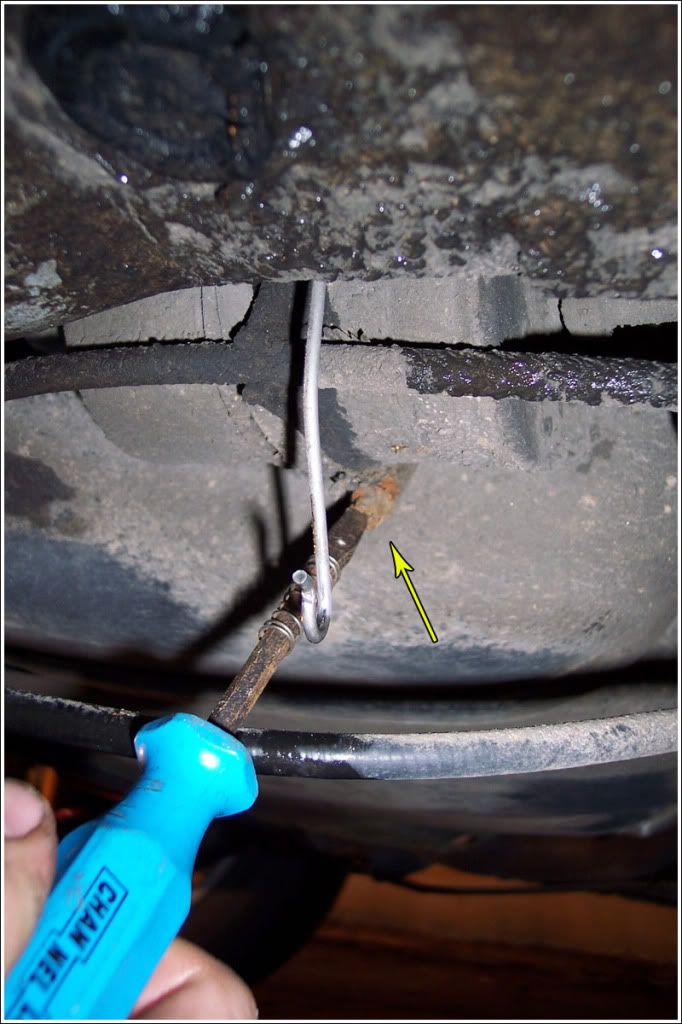
5. Use your angled pick tool to reach around to the front fitting of the fuel filter to release the quick-connect. A screwdriver will not reach, so you need something with a bend in it. Pull it off the front of the fuel filter.
Note – Release the quick-connect SLOWLY to allow pressure to bleed off. Some gas will come out, so have your catch can in place and prepare to get some on your hands.
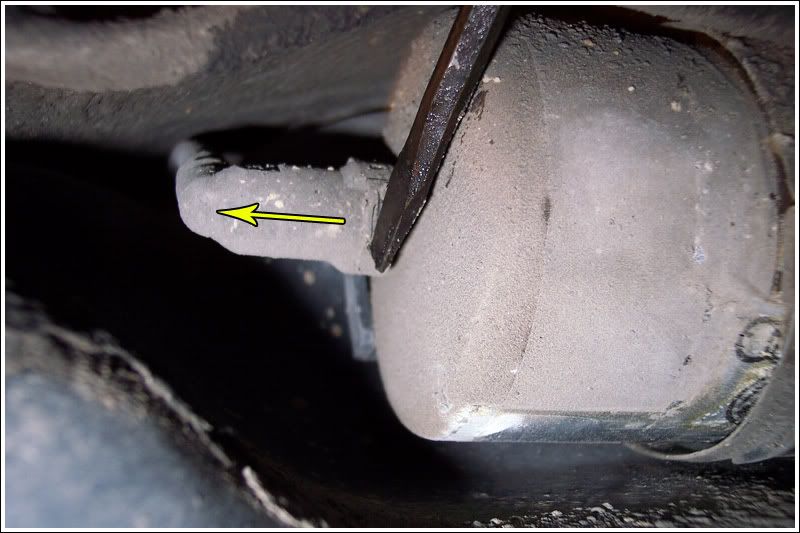
6. Now use your flathead screwdriver to release the quick connect on the rear of the filter. Gently pry the fitting off the filter while applying pressure to the quick-connect. Pull it off the rear of the fuel filter.
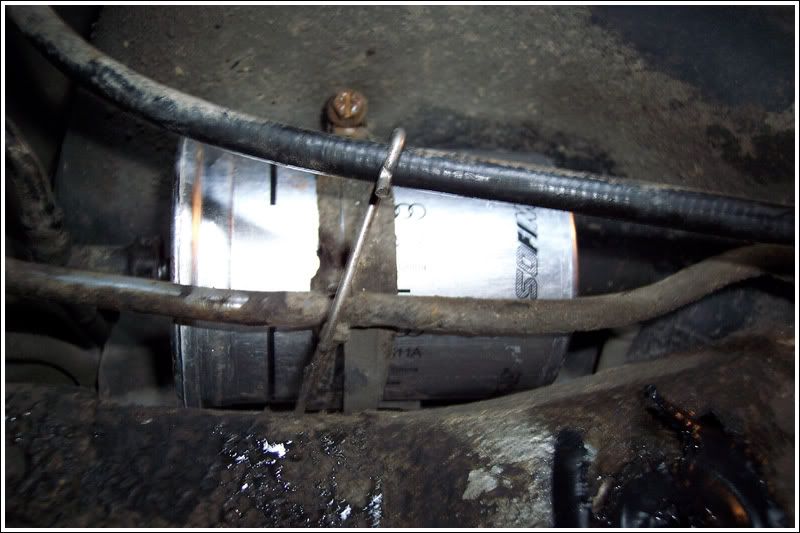
7. Pull the fuel filter towards the front of the car to remove it from the band clamp.
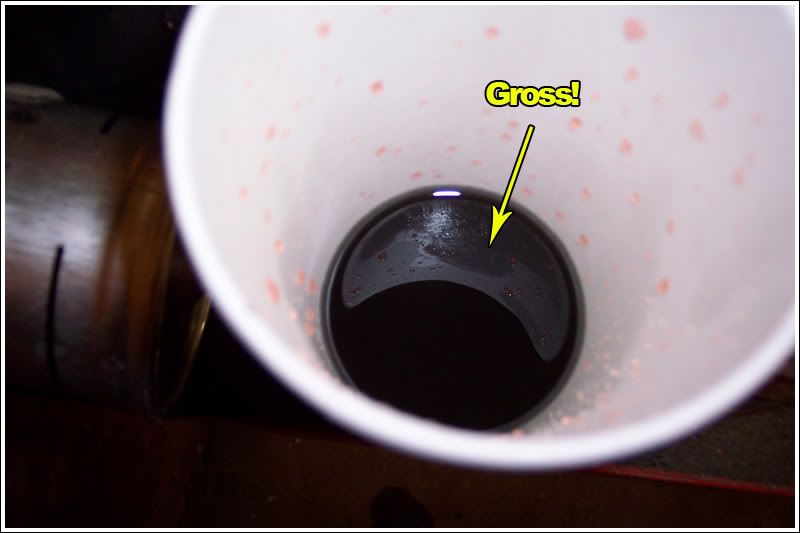
8. Optional Step: Take the fuel filter and pour the contents out into a cup. The fuel that came out of this one was murky black with all sorts of sediment.
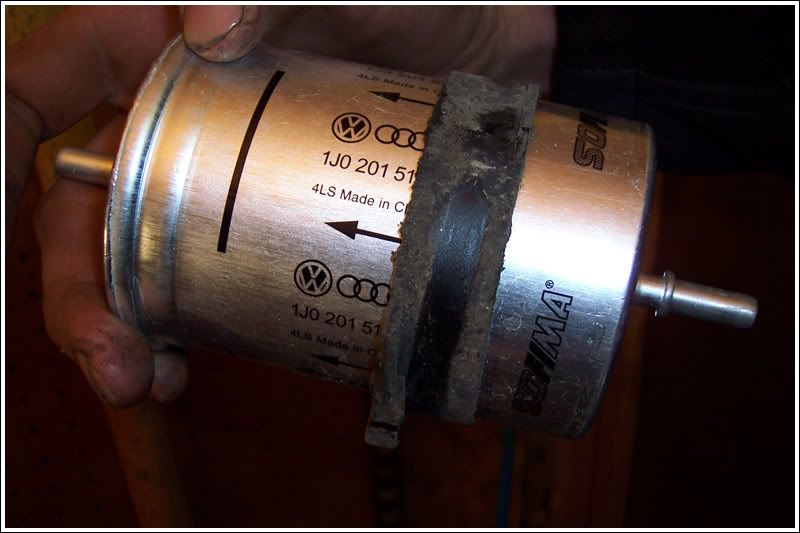
9. Remove the bracket from the old fuel filter and install on the new filter as shown.
10. Pull the gas catch can out and get back under the car. Making sure that the arrow on the filter is pointed towards the front of the car, feed the fuel filter back into the band clamp.
11. Start putting the quick-connect fittings back onto the new filter. Make sure you hear an audible “click” when you do each end.
12. Once the fittings are back on, tighten up the band clamp to secure the filter in place. Almost done!
13. Grab your floor jack and lift the car enough to remove the jack stand. Let the car back down to the ground.
14. Hop in the car and put the key in the ignition. Cycle the key a few times to fill the filter with fuel again. About four times should do it.
15. Start the car to test. If everything fired up fine, you’re done!